![[New] Streamline Your Zoom Meetings Screen Sharing Essentials for 2024](https://thmb.techidaily.com/8e684e3736085a42393dd155a637e8f217c26c390b45353b04f9ee1e79b6412e.jpg)
"[New] Streamline Your Zoom Meetings Screen Sharing Essentials for 2024"
Streamline Your Zoom Meetings: Screen Sharing Essentials
How to Share the Screen with Zoom

Richard Bennett
Mar 27, 2024• Proven solutions
Virtual meetings enable teams to remain highly productive even when they are working remotely. Zoom is a platform that enables its users to host and attend webinars or have meetings so that companies can maintain a high level of productivity even when they’re working from home.
Giving access to your computer to one or all of the participants in a meeting can help you resolve pressing issues and save you time on sending different types of files. Zoom’s screen sharing tools can foster your team’s collaboration and make training more effective. That’s why in this article we are going to show you how to share your device’s screen with Zoom.
- Part 1: How to Share the Screen During Zoom Meeting on iPhone/Android/Web/Desktop
- Part 2: How to Share Multiple Screens with Zoom?
- Part 3: Zoom Screen Sharing Troubleshooting
How to Share the Screen on Different Devices
Each version of Zoom features screen sharing tools, although the exact steps you will have to take in order to share your screen with your colleagues depend on the version of Zoom you are using. Moreover, you must also make sure that Zoom is compatible with the OS that is installed on your device before you can start using this video conferencing app. Here’s how you can share screens on different devices.
1. Sharing the Screen with Zoom from the Web Browser
Zoom web client offers the option to join meetings or share screens directly from the web browser, without prior installation of the application on your computer or your Smartphone. However, the web version of Zoom has limited capabilities and it works best with Google Chrome.
To start sharing a screen you just need to click on the Screen Share button that is located in the meeting toolbar, select the screen you want to share and then click on the Share button in the lower right corner of the window.


Zoom displays the preview of the screen you shared within the meeting window and it allows you to pause, resume or stop sharing the screen at any point. Clicking on the upwards arrow that is located next to the Share Screen button will enable you to choose who is going to have access to the screen you shared.

You can only opt to share a screen with all participants of a meeting or with the host while sharing a screen with the participants you select is not an option.
Want to record the screen sharing on Zoom and watch later in details, check the guide to Record Zoom Meeting.
2. Sharing the Screen from the iPhone or iPad
Before you can start sharing a screen with Zoom from your iPhone or iPad you must go through the first time setup. Head over to the Settings app, select the Customize Controls option from the Control Center.


Once the new window opens you should tap on the + icon next to the Screen Recording option to add it to the device’s control center.
Proceed to launch the Zoom app on your iPhone or iPad and tap on the Share Content icon that is located in the meeting toolbar at the bottom of the screen.

Pick the Screen option from the menu, and then swipe up from the bottom of the device’s screen in order to gain access to the Control Center. Hold the Record button until the Screen Recording option becomes visible, then select Zoom and pick the Start Broadcast option.

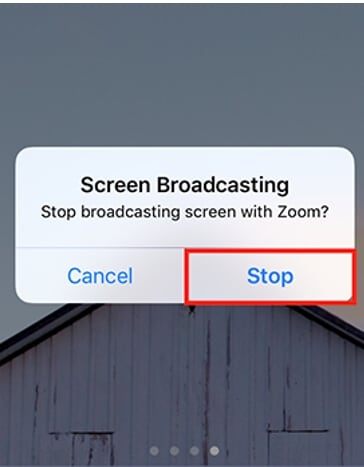
iPhone’s or iPad’s screen will be shared with all participants, and you can stop the broadcast by tapping on the red bar at the top of the screen and tapping on the Stop button in the Screen Recording dialogue box.
In case you want to include audio in your screen broadcast you should tap on the Share Device Audio option in the meeting window.
Note: If you want to record the screen on iPhone and iPad for a long time, you should check some third-party screen recorders for iOS for better recording experience.
 LYRX is an easy-to-use karaoke software with the professional features karaoke hosts need to perform with precision. LYRX is karaoke show hosting software that supports all standard karaoke file types as well as HD video formats, and it’s truly fun to use.
3. Sharing the Screen from an Android Device
You won’t be able to share the screen with Zoom if you don’t have Android 5.0 or some more recent version of the OS installed on your Smartphone. Tap on the Share icon, after you launch Zoom and pick the Screen option from the menu.

Afterward, you should simply tap on the Start Now icon and start sharing the screen along with any application you want with other participants. Optionally, you can use the Annotation tools by tapping on the Annotate icon in the lower-left corner of the meeting window or tap on the Stop Share button if you no longer want to share the device’s screen.
4. Sharing the Screen on Macs and PCs
Using the Zoom’s Share Screen option from Macs and PCs is easy since you just have to click on the Share Screen icon in the meeting toolbar.

You will then be prompted to select the screen you want to share, choose the application that will be shared or opt to share a whiteboard. Click on the Share Computer Sound checkbox in the lower right corner of the window if you want other participants to hear the sounds from your computer. Enable the Optimize for full-screen video clip option in case you want to play a video clip in full screen during the meeting, but make sure that this setting isn’t selected in any other scenario.

Click on the Share button when ready and the application will enter the full-screen mode automatically. The meeting controls will remain available to you while you are sharing the screen so that you can share a new screen, use annotation tools or any of the other available options.

How to Share Multiple Screens with Zoom?
Desktop versions of Zoom allow its users to share several screens simultaneously, but the host of the meeting must enable the Dual-Monitors option. After you sign in to your Zoom account, you should click on your profile picture and click on Settings in the drop-down menu.

Go to the General tab and click on the checkbox next to the Use Dual Monitors option. In addition, you must disable the Remote Support setting before you start a meeting. Once the meeting starts you should click on the arrow next to the Screen Share icon and pick the Multiple participants can share simultaneously option from the menu.

Once this option is activated all participants will be able to share their screens, although the participants who are using the mobile app to participate in a meeting can only share screens if no one else is sharing their screen.
The participants in the meeting who are using a dual monitor setup will be able to see two most recently shared screens, while the participants who only have one monitor can only see one screen at the time. Clicking on the View Options will enable you to select the screen you are currently viewing.
Changing the screen you’re viewing from the Zoom mobile app is not possible. Furthermore, the Share Computer Audio and Optimize for full-screen video clips are unavailable when multiple screens are shared at the same time.
What to Do If the Share Screen Option isn’t Working?
Before you install Zoom on your computer or your Smartphone you must make sure that the app is compatible with the version of the OS your device is using. So, if you can’t find the Screen Share button, you should check if the application is compatible with the operating system.
Furthermore, Windows users who see only a black screen after they share their screen should switch back to the computer’s integrated graphics. You can do this by going to the Windows Control Panel and selecting the graphic card’s control panel.
Click on the Manage 3D Settings option and then choose I would like to use the following 3D settings from the Program Settings menu. You should then go to the Select a Program to Customize the menu and add the Cphost.exe file from the Zoom Bin directory.
Proceed to click on the Add Selected Program, choose the Integrated Graphics setting and click on the Apply button. Head back to Zoom and check if the black screen issue is resolved.
Conclusion
Sharing one or more screens during meetings on Zoom is easy, and it won’t take much more than a few moments of your time, regardless of the device you’re using to run this application. However, you should keep in mind that mobile and web-based versions of the app offer only limited capabilities and that only Mac and PC versions of the app enable users to share multiple screens simultaneously. Did you find this article helpful? Leave a comment and share your experiences with Zoom’s screen sharing options.
Click here to know about the tips to improve video quality in Zoom Meetings .
Richard Bennett
Richard Bennett is a writer and a lover of all things video.
Follow @Richard Bennett
Richard Bennett
Mar 27, 2024• Proven solutions
Virtual meetings enable teams to remain highly productive even when they are working remotely. Zoom is a platform that enables its users to host and attend webinars or have meetings so that companies can maintain a high level of productivity even when they’re working from home.
Giving access to your computer to one or all of the participants in a meeting can help you resolve pressing issues and save you time on sending different types of files. Zoom’s screen sharing tools can foster your team’s collaboration and make training more effective. That’s why in this article we are going to show you how to share your device’s screen with Zoom.
- Part 1: How to Share the Screen During Zoom Meeting on iPhone/Android/Web/Desktop
- Part 2: How to Share Multiple Screens with Zoom?
- Part 3: Zoom Screen Sharing Troubleshooting
How to Share the Screen on Different Devices
Each version of Zoom features screen sharing tools, although the exact steps you will have to take in order to share your screen with your colleagues depend on the version of Zoom you are using. Moreover, you must also make sure that Zoom is compatible with the OS that is installed on your device before you can start using this video conferencing app. Here’s how you can share screens on different devices.
 Lyric Video Creator Professional Version
1. Sharing the Screen with Zoom from the Web Browser
Zoom web client offers the option to join meetings or share screens directly from the web browser, without prior installation of the application on your computer or your Smartphone. However, the web version of Zoom has limited capabilities and it works best with Google Chrome.
To start sharing a screen you just need to click on the Screen Share button that is located in the meeting toolbar, select the screen you want to share and then click on the Share button in the lower right corner of the window.
Zoom displays the preview of the screen you shared within the meeting window and it allows you to pause, resume or stop sharing the screen at any point. Clicking on the upwards arrow that is located next to the Share Screen button will enable you to choose who is going to have access to the screen you shared.
You can only opt to share a screen with all participants of a meeting or with the host while sharing a screen with the participants you select is not an option.
Want to record the screen sharing on Zoom and watch later in details, check the guide to Record Zoom Meeting.
2. Sharing the Screen from the iPhone or iPad
Before you can start sharing a screen with Zoom from your iPhone or iPad you must go through the first time setup. Head over to the Settings app, select the Customize Controls option from the Control Center.
Once the new window opens you should tap on the + icon next to the Screen Recording option to add it to the device’s control center.
Proceed to launch the Zoom app on your iPhone or iPad and tap on the Share Content icon that is located in the meeting toolbar at the bottom of the screen.
Pick the Screen option from the menu, and then swipe up from the bottom of the device’s screen in order to gain access to the Control Center. Hold the Record button until the Screen Recording option becomes visible, then select Zoom and pick the Start Broadcast option.
iPhone’s or iPad’s screen will be shared with all participants, and you can stop the broadcast by tapping on the red bar at the top of the screen and tapping on the Stop button in the Screen Recording dialogue box.
In case you want to include audio in your screen broadcast you should tap on the Share Device Audio option in the meeting window.
Note: If you want to record the screen on iPhone and iPad for a long time, you should check some third-party screen recorders for iOS for better recording experience.
3. Sharing the Screen from an Android Device
You won’t be able to share the screen with Zoom if you don’t have Android 5.0 or some more recent version of the OS installed on your Smartphone. Tap on the Share icon, after you launch Zoom and pick the Screen option from the menu.
 DEX 3 RE is Easy-To-Use DJ Mixing Software for MAC and Windows Designed for Today’s Versatile DJ.
Mix from your own library of music, iTunes or use the Pulselocker subsciprtion service for in-app access to over 44 million songs. Use with over 85 supported DJ controllers or mix with a keyboard and mouse.
DEX 3 RE is everything you need without the clutter - the perfect 2-deck mixing software solution for mobile DJs or hard-core hobbiests.
PCDJ DEX 3 RE (DJ Software for Win & MAC - Product Activation For 3 Machines)
Afterward, you should simply tap on the Start Now icon and start sharing the screen along with any application you want with other participants. Optionally, you can use the Annotation tools by tapping on the Annotate icon in the lower-left corner of the meeting window or tap on the Stop Share button if you no longer want to share the device’s screen.
4. Sharing the Screen on Macs and PCs
Using the Zoom’s Share Screen option from Macs and PCs is easy since you just have to click on the Share Screen icon in the meeting toolbar.
You will then be prompted to select the screen you want to share, choose the application that will be shared or opt to share a whiteboard. Click on the Share Computer Sound checkbox in the lower right corner of the window if you want other participants to hear the sounds from your computer. Enable the Optimize for full-screen video clip option in case you want to play a video clip in full screen during the meeting, but make sure that this setting isn’t selected in any other scenario.
Click on the Share button when ready and the application will enter the full-screen mode automatically. The meeting controls will remain available to you while you are sharing the screen so that you can share a new screen, use annotation tools or any of the other available options.
How to Share Multiple Screens with Zoom?
Desktop versions of Zoom allow its users to share several screens simultaneously, but the host of the meeting must enable the Dual-Monitors option. After you sign in to your Zoom account, you should click on your profile picture and click on Settings in the drop-down menu.
 Jet Profiler for MySQL, Enterprise Version: Jet Profiler for MySQL is real-time query performance and diagnostics tool for the MySQL database server. Its detailed query information, graphical interface and ease of use makes this a great tool for finding performance bottlenecks in your MySQL databases.
Go to the General tab and click on the checkbox next to the Use Dual Monitors option. In addition, you must disable the Remote Support setting before you start a meeting. Once the meeting starts you should click on the arrow next to the Screen Share icon and pick the Multiple participants can share simultaneously option from the menu.
Once this option is activated all participants will be able to share their screens, although the participants who are using the mobile app to participate in a meeting can only share screens if no one else is sharing their screen.
The participants in the meeting who are using a dual monitor setup will be able to see two most recently shared screens, while the participants who only have one monitor can only see one screen at the time. Clicking on the View Options will enable you to select the screen you are currently viewing.
Changing the screen you’re viewing from the Zoom mobile app is not possible. Furthermore, the Share Computer Audio and Optimize for full-screen video clips are unavailable when multiple screens are shared at the same time.
What to Do If the Share Screen Option isn’t Working?
Before you install Zoom on your computer or your Smartphone you must make sure that the app is compatible with the version of the OS your device is using. So, if you can’t find the Screen Share button, you should check if the application is compatible with the operating system.
Furthermore, Windows users who see only a black screen after they share their screen should switch back to the computer’s integrated graphics. You can do this by going to the Windows Control Panel and selecting the graphic card’s control panel.
Click on the Manage 3D Settings option and then choose I would like to use the following 3D settings from the Program Settings menu. You should then go to the Select a Program to Customize the menu and add the Cphost.exe file from the Zoom Bin directory.
Proceed to click on the Add Selected Program, choose the Integrated Graphics setting and click on the Apply button. Head back to Zoom and check if the black screen issue is resolved.
Conclusion
Sharing one or more screens during meetings on Zoom is easy, and it won’t take much more than a few moments of your time, regardless of the device you’re using to run this application. However, you should keep in mind that mobile and web-based versions of the app offer only limited capabilities and that only Mac and PC versions of the app enable users to share multiple screens simultaneously. Did you find this article helpful? Leave a comment and share your experiences with Zoom’s screen sharing options.
Click here to know about the tips to improve video quality in Zoom Meetings .
Richard Bennett
Richard Bennett is a writer and a lover of all things video.
Follow @Richard Bennett
Richard Bennett
Mar 27, 2024• Proven solutions
Virtual meetings enable teams to remain highly productive even when they are working remotely. Zoom is a platform that enables its users to host and attend webinars or have meetings so that companies can maintain a high level of productivity even when they’re working from home.
Giving access to your computer to one or all of the participants in a meeting can help you resolve pressing issues and save you time on sending different types of files. Zoom’s screen sharing tools can foster your team’s collaboration and make training more effective. That’s why in this article we are going to show you how to share your device’s screen with Zoom.
- Part 1: How to Share the Screen During Zoom Meeting on iPhone/Android/Web/Desktop
- Part 2: How to Share Multiple Screens with Zoom?
- Part 3: Zoom Screen Sharing Troubleshooting

How to Share the Screen on Different Devices
Each version of Zoom features screen sharing tools, although the exact steps you will have to take in order to share your screen with your colleagues depend on the version of Zoom you are using. Moreover, you must also make sure that Zoom is compatible with the OS that is installed on your device before you can start using this video conferencing app. Here’s how you can share screens on different devices.
1. Sharing the Screen with Zoom from the Web Browser
Zoom web client offers the option to join meetings or share screens directly from the web browser, without prior installation of the application on your computer or your Smartphone. However, the web version of Zoom has limited capabilities and it works best with Google Chrome.
To start sharing a screen you just need to click on the Screen Share button that is located in the meeting toolbar, select the screen you want to share and then click on the Share button in the lower right corner of the window.

Zoom displays the preview of the screen you shared within the meeting window and it allows you to pause, resume or stop sharing the screen at any point. Clicking on the upwards arrow that is located next to the Share Screen button will enable you to choose who is going to have access to the screen you shared.
 SwifDoo PDF 2-Year Plan
You can only opt to share a screen with all participants of a meeting or with the host while sharing a screen with the participants you select is not an option.
Want to record the screen sharing on Zoom and watch later in details, check the guide to Record Zoom Meeting.
2. Sharing the Screen from the iPhone or iPad
Before you can start sharing a screen with Zoom from your iPhone or iPad you must go through the first time setup. Head over to the Settings app, select the Customize Controls option from the Control Center.
Once the new window opens you should tap on the + icon next to the Screen Recording option to add it to the device’s control center.
Proceed to launch the Zoom app on your iPhone or iPad and tap on the Share Content icon that is located in the meeting toolbar at the bottom of the screen.
Pick the Screen option from the menu, and then swipe up from the bottom of the device’s screen in order to gain access to the Control Center. Hold the Record button until the Screen Recording option becomes visible, then select Zoom and pick the Start Broadcast option.
iPhone’s or iPad’s screen will be shared with all participants, and you can stop the broadcast by tapping on the red bar at the top of the screen and tapping on the Stop button in the Screen Recording dialogue box.
In case you want to include audio in your screen broadcast you should tap on the Share Device Audio option in the meeting window.
Note: If you want to record the screen on iPhone and iPad for a long time, you should check some third-party screen recorders for iOS for better recording experience.
3. Sharing the Screen from an Android Device
You won’t be able to share the screen with Zoom if you don’t have Android 5.0 or some more recent version of the OS installed on your Smartphone. Tap on the Share icon, after you launch Zoom and pick the Screen option from the menu.
 Video Converter Factory Pro
Afterward, you should simply tap on the Start Now icon and start sharing the screen along with any application you want with other participants. Optionally, you can use the Annotation tools by tapping on the Annotate icon in the lower-left corner of the meeting window or tap on the Stop Share button if you no longer want to share the device’s screen.

4. Sharing the Screen on Macs and PCs
Using the Zoom’s Share Screen option from Macs and PCs is easy since you just have to click on the Share Screen icon in the meeting toolbar.
You will then be prompted to select the screen you want to share, choose the application that will be shared or opt to share a whiteboard. Click on the Share Computer Sound checkbox in the lower right corner of the window if you want other participants to hear the sounds from your computer. Enable the Optimize for full-screen video clip option in case you want to play a video clip in full screen during the meeting, but make sure that this setting isn’t selected in any other scenario.
Click on the Share button when ready and the application will enter the full-screen mode automatically. The meeting controls will remain available to you while you are sharing the screen so that you can share a new screen, use annotation tools or any of the other available options.
How to Share Multiple Screens with Zoom?
Desktop versions of Zoom allow its users to share several screens simultaneously, but the host of the meeting must enable the Dual-Monitors option. After you sign in to your Zoom account, you should click on your profile picture and click on Settings in the drop-down menu.
Go to the General tab and click on the checkbox next to the Use Dual Monitors option. In addition, you must disable the Remote Support setting before you start a meeting. Once the meeting starts you should click on the arrow next to the Screen Share icon and pick the Multiple participants can share simultaneously option from the menu.
Once this option is activated all participants will be able to share their screens, although the participants who are using the mobile app to participate in a meeting can only share screens if no one else is sharing their screen.
The participants in the meeting who are using a dual monitor setup will be able to see two most recently shared screens, while the participants who only have one monitor can only see one screen at the time. Clicking on the View Options will enable you to select the screen you are currently viewing.
Changing the screen you’re viewing from the Zoom mobile app is not possible. Furthermore, the Share Computer Audio and Optimize for full-screen video clips are unavailable when multiple screens are shared at the same time.
What to Do If the Share Screen Option isn’t Working?
Before you install Zoom on your computer or your Smartphone you must make sure that the app is compatible with the version of the OS your device is using. So, if you can’t find the Screen Share button, you should check if the application is compatible with the operating system.
Furthermore, Windows users who see only a black screen after they share their screen should switch back to the computer’s integrated graphics. You can do this by going to the Windows Control Panel and selecting the graphic card’s control panel.
Click on the Manage 3D Settings option and then choose I would like to use the following 3D settings from the Program Settings menu. You should then go to the Select a Program to Customize the menu and add the Cphost.exe file from the Zoom Bin directory.
Proceed to click on the Add Selected Program, choose the Integrated Graphics setting and click on the Apply button. Head back to Zoom and check if the black screen issue is resolved.
Conclusion
Sharing one or more screens during meetings on Zoom is easy, and it won’t take much more than a few moments of your time, regardless of the device you’re using to run this application. However, you should keep in mind that mobile and web-based versions of the app offer only limited capabilities and that only Mac and PC versions of the app enable users to share multiple screens simultaneously. Did you find this article helpful? Leave a comment and share your experiences with Zoom’s screen sharing options.
Click here to know about the tips to improve video quality in Zoom Meetings .
Richard Bennett
Richard Bennett is a writer and a lover of all things video.
Follow @Richard Bennett
Richard Bennett
Mar 27, 2024• Proven solutions
Virtual meetings enable teams to remain highly productive even when they are working remotely. Zoom is a platform that enables its users to host and attend webinars or have meetings so that companies can maintain a high level of productivity even when they’re working from home.
Giving access to your computer to one or all of the participants in a meeting can help you resolve pressing issues and save you time on sending different types of files. Zoom’s screen sharing tools can foster your team’s collaboration and make training more effective. That’s why in this article we are going to show you how to share your device’s screen with Zoom.
- Part 1: How to Share the Screen During Zoom Meeting on iPhone/Android/Web/Desktop
- Part 2: How to Share Multiple Screens with Zoom?
- Part 3: Zoom Screen Sharing Troubleshooting
How to Share the Screen on Different Devices
Each version of Zoom features screen sharing tools, although the exact steps you will have to take in order to share your screen with your colleagues depend on the version of Zoom you are using. Moreover, you must also make sure that Zoom is compatible with the OS that is installed on your device before you can start using this video conferencing app. Here’s how you can share screens on different devices.
1. Sharing the Screen with Zoom from the Web Browser
Zoom web client offers the option to join meetings or share screens directly from the web browser, without prior installation of the application on your computer or your Smartphone. However, the web version of Zoom has limited capabilities and it works best with Google Chrome.
To start sharing a screen you just need to click on the Screen Share button that is located in the meeting toolbar, select the screen you want to share and then click on the Share button in the lower right corner of the window.
Zoom displays the preview of the screen you shared within the meeting window and it allows you to pause, resume or stop sharing the screen at any point. Clicking on the upwards arrow that is located next to the Share Screen button will enable you to choose who is going to have access to the screen you shared.
You can only opt to share a screen with all participants of a meeting or with the host while sharing a screen with the participants you select is not an option.
Want to record the screen sharing on Zoom and watch later in details, check the guide to Record Zoom Meeting.
2. Sharing the Screen from the iPhone or iPad
Before you can start sharing a screen with Zoom from your iPhone or iPad you must go through the first time setup. Head over to the Settings app, select the Customize Controls option from the Control Center.
Once the new window opens you should tap on the + icon next to the Screen Recording option to add it to the device’s control center.
Proceed to launch the Zoom app on your iPhone or iPad and tap on the Share Content icon that is located in the meeting toolbar at the bottom of the screen.
Pick the Screen option from the menu, and then swipe up from the bottom of the device’s screen in order to gain access to the Control Center. Hold the Record button until the Screen Recording option becomes visible, then select Zoom and pick the Start Broadcast option.
iPhone’s or iPad’s screen will be shared with all participants, and you can stop the broadcast by tapping on the red bar at the top of the screen and tapping on the Stop button in the Screen Recording dialogue box.

In case you want to include audio in your screen broadcast you should tap on the Share Device Audio option in the meeting window.
Note: If you want to record the screen on iPhone and iPad for a long time, you should check some third-party screen recorders for iOS for better recording experience.
3. Sharing the Screen from an Android Device
You won’t be able to share the screen with Zoom if you don’t have Android 5.0 or some more recent version of the OS installed on your Smartphone. Tap on the Share icon, after you launch Zoom and pick the Screen option from the menu.
Afterward, you should simply tap on the Start Now icon and start sharing the screen along with any application you want with other participants. Optionally, you can use the Annotation tools by tapping on the Annotate icon in the lower-left corner of the meeting window or tap on the Stop Share button if you no longer want to share the device’s screen.
 vMix HD - Software based live production. vMix HD includes everything in vMix Basic HD plus 1000 inputs, Video List, 4 Overlay Channels, and 1 vMix Call
4. Sharing the Screen on Macs and PCs
Using the Zoom’s Share Screen option from Macs and PCs is easy since you just have to click on the Share Screen icon in the meeting toolbar.
You will then be prompted to select the screen you want to share, choose the application that will be shared or opt to share a whiteboard. Click on the Share Computer Sound checkbox in the lower right corner of the window if you want other participants to hear the sounds from your computer. Enable the Optimize for full-screen video clip option in case you want to play a video clip in full screen during the meeting, but make sure that this setting isn’t selected in any other scenario.

Click on the Share button when ready and the application will enter the full-screen mode automatically. The meeting controls will remain available to you while you are sharing the screen so that you can share a new screen, use annotation tools or any of the other available options.
How to Share Multiple Screens with Zoom?
Desktop versions of Zoom allow its users to share several screens simultaneously, but the host of the meeting must enable the Dual-Monitors option. After you sign in to your Zoom account, you should click on your profile picture and click on Settings in the drop-down menu.
Go to the General tab and click on the checkbox next to the Use Dual Monitors option. In addition, you must disable the Remote Support setting before you start a meeting. Once the meeting starts you should click on the arrow next to the Screen Share icon and pick the Multiple participants can share simultaneously option from the menu.
Once this option is activated all participants will be able to share their screens, although the participants who are using the mobile app to participate in a meeting can only share screens if no one else is sharing their screen.
The participants in the meeting who are using a dual monitor setup will be able to see two most recently shared screens, while the participants who only have one monitor can only see one screen at the time. Clicking on the View Options will enable you to select the screen you are currently viewing.
Changing the screen you’re viewing from the Zoom mobile app is not possible. Furthermore, the Share Computer Audio and Optimize for full-screen video clips are unavailable when multiple screens are shared at the same time.
What to Do If the Share Screen Option isn’t Working?
Before you install Zoom on your computer or your Smartphone you must make sure that the app is compatible with the version of the OS your device is using. So, if you can’t find the Screen Share button, you should check if the application is compatible with the operating system.
Furthermore, Windows users who see only a black screen after they share their screen should switch back to the computer’s integrated graphics. You can do this by going to the Windows Control Panel and selecting the graphic card’s control panel.
Click on the Manage 3D Settings option and then choose I would like to use the following 3D settings from the Program Settings menu. You should then go to the Select a Program to Customize the menu and add the Cphost.exe file from the Zoom Bin directory.
Proceed to click on the Add Selected Program, choose the Integrated Graphics setting and click on the Apply button. Head back to Zoom and check if the black screen issue is resolved.
Conclusion
Sharing one or more screens during meetings on Zoom is easy, and it won’t take much more than a few moments of your time, regardless of the device you’re using to run this application. However, you should keep in mind that mobile and web-based versions of the app offer only limited capabilities and that only Mac and PC versions of the app enable users to share multiple screens simultaneously. Did you find this article helpful? Leave a comment and share your experiences with Zoom’s screen sharing options.
Click here to know about the tips to improve video quality in Zoom Meetings .
Richard Bennett
Richard Bennett is a writer and a lover of all things video.
Follow @Richard Bennett
- Title: [New] Streamline Your Zoom Meetings Screen Sharing Essentials for 2024
- Author: Catherine
- Created at : 2024-07-19 13:56:14
- Updated at : 2024-07-20 13:56:14
- Link: https://desktop-recording.techidaily.com/new-streamline-your-zoom-meetings-screen-sharing-essentials-for-2024/
- License: This work is licensed under CC BY-NC-SA 4.0.