![[Updated] Enhancing Slideshow Impact with Webcam Integration for 2024](https://thmb.techidaily.com/8ec7f9d19b5395810145f1bf31b1db142a6ba9be6ed8b5f1e4a621d2eef1f390.jpg)
[Updated] Enhancing Slideshow Impact with Webcam Integration for 2024
Enhancing Slideshow Impact with Webcam Integration
PowerPoint presentation is still the most effective way of conveying an idea, a topic, or an agenda digitally. In today’s world, meetings and classes are conducted online and PowerPoint presentations are used to show the topic and sub-topics of discussion. Sometimes, you need to record PowerPoint presentation with webcam so that anyone can check it out any time they want. Therefore, if someone misses out on the online sessions, he can check the recorded session.
Besides, you may want to record PowerPoint with webcam and send your recording across to your team members, clients, and even students. In fact, there are many video creators who upload educational and informational videos on video streaming platforms where they record their PPT with webcam. In this article, we will illustrate how to record a PowerPoint presentation with webcam.
Way 1. Use PowerPoint Recording Feature
Way 2. Record PPT and Webcam with Filmora
Way 3. Record PPT and Face with Panopto
Way 4. Record PPT and Camera with Camtasia
Way 1. Record PPT and Webcam with PowerPoint Recording Feature
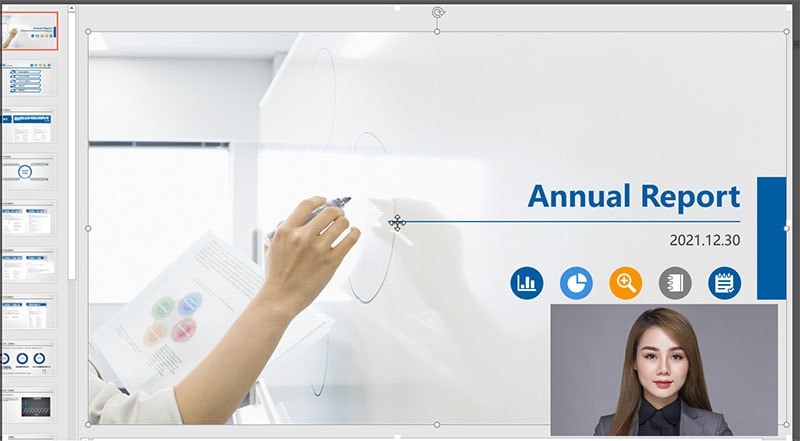
The easiest way to record webcam with PowerPoint presentation is by using PowerPoint’s built-in recording option. Yes, PowerPoint does come with an option to record slide show along with webcam and mic. The video from the webcam will be shown in Picture-in-Picture mode at one corner on top of the PowerPoint presentation. Here are the steps to record PPT with webcam without installing any external software.
Step 1: Open PowerPoint and your presentation file.
Step 2: Go to Slide Show tab and click on Record Slide Show.
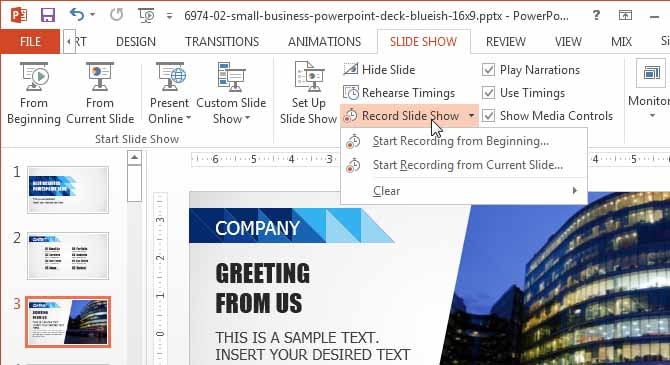
Step 3: On the next screen, go to Settings located at the top-right corner. Select webcam and microphone properly.
Step 4: Click on Record button at the top-left corner. You will get three seconds to get started.
Step 5: When you want to stop recording, click on Stop button at the top-left corner.
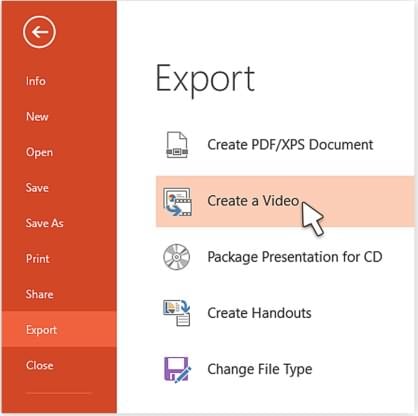
Step 6: Go to File> Export> Create A Video to save the recorded file.
Way 2. Record PPT and Webcam with Wondershare Filmora
There are some issues reported by users when they tried to record PPT with webcam such as video glitches, microphone sound not picking up and likewise. The best way to record PowerPoint presentation with webcam Mac and Windows is by using Filmora Screen Recorder . It is a premium software that is designed for recording video as well as editing videos like a professional. To record PPT with webcam, you need to record the screen along with webcam and microphone. Here are the steps you need to follow.
Step 1: Download and install Wondershare Filmora on your computer.
For Win 7 or later (64-bit)
For macOS 10.12 or later
Step 2: Open Filmora and click on New Project option.
Step 3: Go to Record and then go to Record PC Screen option.

Step 4: Set screen size which is likely to be full screen for PPT. Make sure to turn on Microphone option to record your audio.
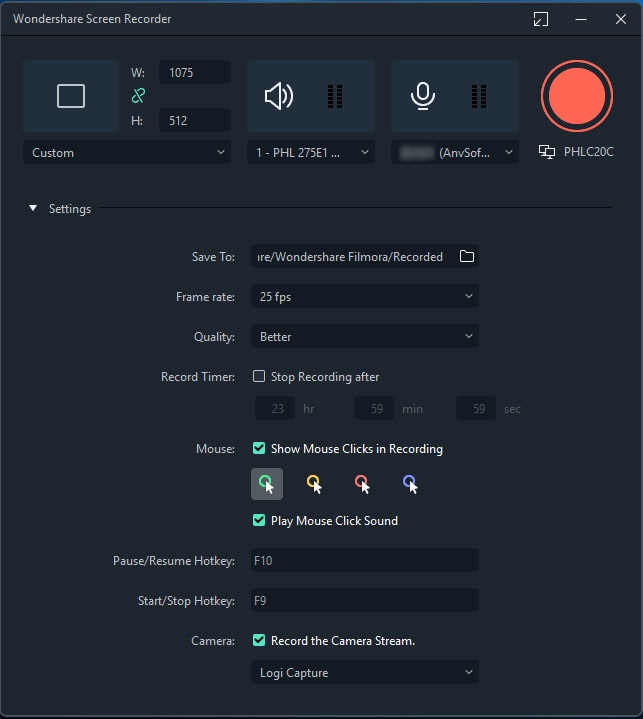
Step 5: Click on Gear icon at the Gear icon and select “Record The Camera Stream” option to record the webcam along with PPT.
Step 6: When you are ready, click on Record button.
You will get a few buffer seconds to start your PowerPoint slides and start your presentation.
Step 7: Click on Stop button to stop recording whenever it is done and export the recorded file to save it.
Way 3. Record PPT and Webcam with Panopto
If you are looking for a free online video and screen recorder to record webcam with PowerPoint, Panopto is a great platform. The online platform of Panopto is super simple to use and the interface is as clean as it gets. With Panopto, you can record PPT with your narration in PiP mode as well as record PPT with your voice only. Here are the steps to follow to record PowerPoint with webcam on Panopto.
Step 1: Open PowerPoint and open your PPT slides and get ready for recording.
Step 2: Open your web browser and visit <www.panopto.com/record/?capture> .
Step 3: Connect your webcam and microphone and Panopto will automatically detect them. You can click on Audio and Video tab at the top to ensure that the devices are configured correctly and working properly.
Step 4: Click on Screen and Apps and select screen recording size which is likely to be Entire Screen in PowerPoint Presentation.
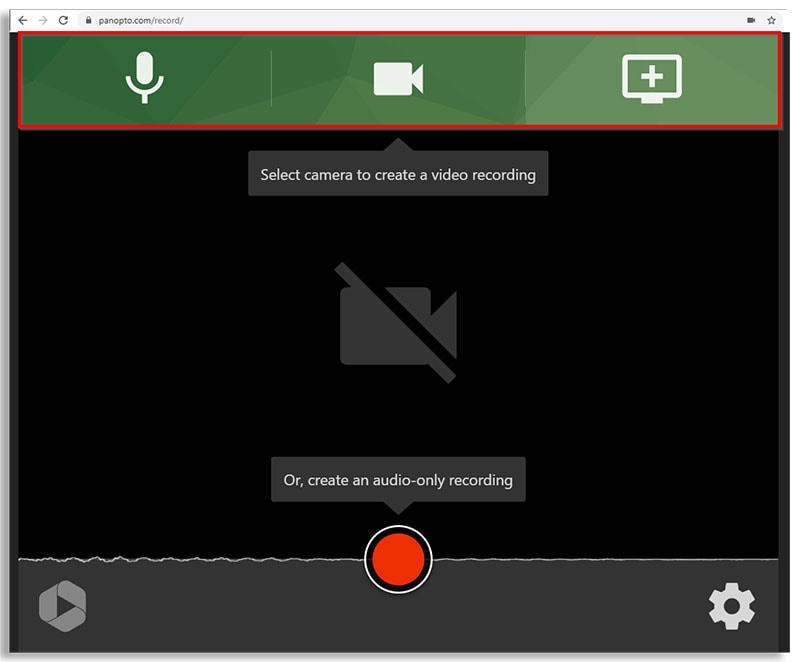
Step 5: Then click on Video to record your webcam video in PiP mode.
Step 6: Finally, click on Record button and start recording your presentation.

Step 7: When you are done, click on Stop button and on the next screen, you can download the recorded video.
Way 4. Record PPT and Webcam with Camtasia
Camtasia is a professional screen and video recorder with versatile video editing features. Before purchasing its premium plan, you can use its free trial version. You can capture anything on the screen starting from websites and PPT to video calls and gameplays. There is a PowerPoint Add-In available and you can even import PPT slides into Camtasia for convenience in recording PowerPoint presentations. Here are the steps to follow on how do you record a PowerPoint with a webcam
Step 1: Download and install Camtasia. Camtasia comes with PPT add-in so that you get the recording options directly from PowerPoint.
Step 2: Open PowerPoint and open the file where there are slides for presentation.
Step 3: Go to Add-In tab and you will see all the recording controls. If you cannot see Add-In tab, go to File> Options> Add-ins and enable Camtasia.

Step 4: Click on Recording Options to enable audio and camera recording.
Step 5: Turn on Record Audio option and Record from Camera option from Picture in Picture. And click on Ok button.

Step 6: Click on Record button and start your presentation.
Step 7: At the bottom-right corner, click on “Click To begin Recording” button.
Step 8: Press Esc on your keyboard to Stop Recording. You can save the recorded video on your hard drive.
Filmora Screen Recorder
Record computer screen and webcam
Capture system and microphone audio
Customize the target recording area
Edit videos with thousands of effects and tools
The Bottom Line
Hopefully, you have understood how do you record a PowerPoint with a webcam. You can do it using PowerPoint’s inbuilt recording option as well as using an online recording tool. In both these methods, you do not need any external software but they have certain shortcomings. Hence, we recommend you Wondershare Filmora to record PPT with webcam and edit it before sharing and publishing on any platform.
Way 2. Record PPT and Webcam with Filmora
Way 3. Record PPT and Face with Panopto
Way 4. Record PPT and Camera with Camtasia
Way 1. Record PPT and Webcam with PowerPoint Recording Feature
The easiest way to record webcam with PowerPoint presentation is by using PowerPoint’s built-in recording option. Yes, PowerPoint does come with an option to record slide show along with webcam and mic. The video from the webcam will be shown in Picture-in-Picture mode at one corner on top of the PowerPoint presentation. Here are the steps to record PPT with webcam without installing any external software.
Step 1: Open PowerPoint and your presentation file.
Step 2: Go to Slide Show tab and click on Record Slide Show.
Step 3: On the next screen, go to Settings located at the top-right corner. Select webcam and microphone properly.
Step 4: Click on Record button at the top-left corner. You will get three seconds to get started.
Step 5: When you want to stop recording, click on Stop button at the top-left corner.
Step 6: Go to File> Export> Create A Video to save the recorded file.
Way 2. Record PPT and Webcam with Wondershare Filmora
There are some issues reported by users when they tried to record PPT with webcam such as video glitches, microphone sound not picking up and likewise. The best way to record PowerPoint presentation with webcam Mac and Windows is by using Filmora Screen Recorder . It is a premium software that is designed for recording video as well as editing videos like a professional. To record PPT with webcam, you need to record the screen along with webcam and microphone. Here are the steps you need to follow.
Step 1: Download and install Wondershare Filmora on your computer.
For Win 7 or later (64-bit)
For macOS 10.12 or later
Step 2: Open Filmora and click on New Project option.
Step 3: Go to Record and then go to Record PC Screen option.
Step 4: Set screen size which is likely to be full screen for PPT. Make sure to turn on Microphone option to record your audio.
Step 5: Click on Gear icon at the Gear icon and select “Record The Camera Stream” option to record the webcam along with PPT.
Step 6: When you are ready, click on Record button.
You will get a few buffer seconds to start your PowerPoint slides and start your presentation.
Step 7: Click on Stop button to stop recording whenever it is done and export the recorded file to save it.
Way 3. Record PPT and Webcam with Panopto
If you are looking for a free online video and screen recorder to record webcam with PowerPoint, Panopto is a great platform. The online platform of Panopto is super simple to use and the interface is as clean as it gets. With Panopto, you can record PPT with your narration in PiP mode as well as record PPT with your voice only. Here are the steps to follow to record PowerPoint with webcam on Panopto.
Step 1: Open PowerPoint and open your PPT slides and get ready for recording.
Step 2: Open your web browser and visit <www.panopto.com/record/?capture> .
Step 3: Connect your webcam and microphone and Panopto will automatically detect them. You can click on Audio and Video tab at the top to ensure that the devices are configured correctly and working properly.
Step 4: Click on Screen and Apps and select screen recording size which is likely to be Entire Screen in PowerPoint Presentation.
Step 5: Then click on Video to record your webcam video in PiP mode.
Step 6: Finally, click on Record button and start recording your presentation.
Step 7: When you are done, click on Stop button and on the next screen, you can download the recorded video.
Way 4. Record PPT and Webcam with Camtasia
Camtasia is a professional screen and video recorder with versatile video editing features. Before purchasing its premium plan, you can use its free trial version. You can capture anything on the screen starting from websites and PPT to video calls and gameplays. There is a PowerPoint Add-In available and you can even import PPT slides into Camtasia for convenience in recording PowerPoint presentations. Here are the steps to follow on how do you record a PowerPoint with a webcam
Step 1: Download and install Camtasia. Camtasia comes with PPT add-in so that you get the recording options directly from PowerPoint.
Step 2: Open PowerPoint and open the file where there are slides for presentation.
Step 3: Go to Add-In tab and you will see all the recording controls. If you cannot see Add-In tab, go to File> Options> Add-ins and enable Camtasia.
Step 4: Click on Recording Options to enable audio and camera recording.
Step 5: Turn on Record Audio option and Record from Camera option from Picture in Picture. And click on Ok button.
Step 6: Click on Record button and start your presentation.
Step 7: At the bottom-right corner, click on “Click To begin Recording” button.
Step 8: Press Esc on your keyboard to Stop Recording. You can save the recorded video on your hard drive.
Filmora Screen Recorder
Record computer screen and webcam
Capture system and microphone audio
Customize the target recording area
Edit videos with thousands of effects and tools
The Bottom Line
Hopefully, you have understood how do you record a PowerPoint with a webcam. You can do it using PowerPoint’s inbuilt recording option as well as using an online recording tool. In both these methods, you do not need any external software but they have certain shortcomings. Hence, we recommend you Wondershare Filmora to record PPT with webcam and edit it before sharing and publishing on any platform.
Also read:
- [New] In 2024, Pinnacle Predictors Top TikTok Income Calculators
- [New] Top AI Enhanced Photoshop Suite
- [Updated] 2024 Approved Screencastify Recorder - A Complete Step-Wise How-To Guide
- [Updated] Cross-Platform IPTV Capture for 2024
- [Updated] In 2024, Quick Guide to Alter Username in Google Meet Sessions
- [Updated] Slash Prices on Cameras Best Value List of Top 6 Under $100 for 2024
- Corsair HS60 Mic Issues? Here's How to Restore Your Voice Chat Functionality
- Cutting-Edge Techniques for GoPro Users
- In 2024, Who's Leading in Screen Capture Tech OBS Studios Vs. Bandicam
- Transforming Your Images with a Stunning Azure Backdrop: A Step-by-Step Guide
- Winning Strategies & Hashtags for YouTube's Best FreeFirers for 2024
- Title: [Updated] Enhancing Slideshow Impact with Webcam Integration for 2024
- Author: Catherine
- Created at : 2025-02-06 03:04:56
- Updated at : 2025-02-07 20:10:28
- Link: https://desktop-recording.techidaily.com/updated-enhancing-slideshow-impact-with-webcam-integration-for-2024/
- License: This work is licensed under CC BY-NC-SA 4.0.